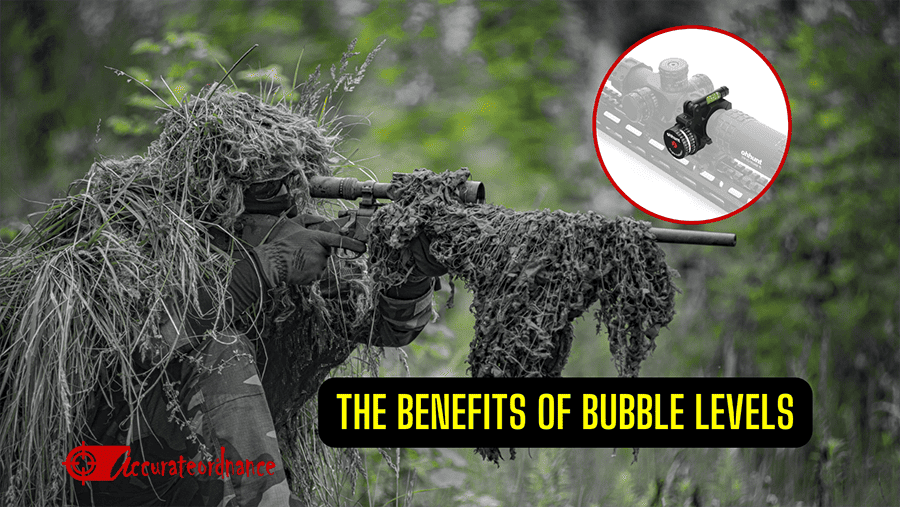
Have you ever wondered what separates a good shot from a great one? What if I told you that a tiny bubble and a few numbers could improve your shooting accuracy, transforming you from an average marksman into a sharpshooter with unparalleled precision? Before you dismiss the idea, remember that in the world of firearms, fractions of an inch can mean the difference between hitting the bullseye and missing the mark entirely; therefore, every advantage counts.
Whether you’re a competitive shooter seeking victory on the range, a sniper, or a hunter striving for an ethical and humane kill, the quest for accuracy never ceases. In this quest, tools like bubble levels and angle cosine indicators become very useful, quietly working behind the scenes to ensure your shots are as precise as possible.
Are you ready to explore the often-overlooked but incredibly valuable tools that can give you the edge you need? Welcome to the world of bubble levels and angle cosine indicators (ACIs), where subtleties matter and accuracy reign supreme.
What Is A Bubble Level?
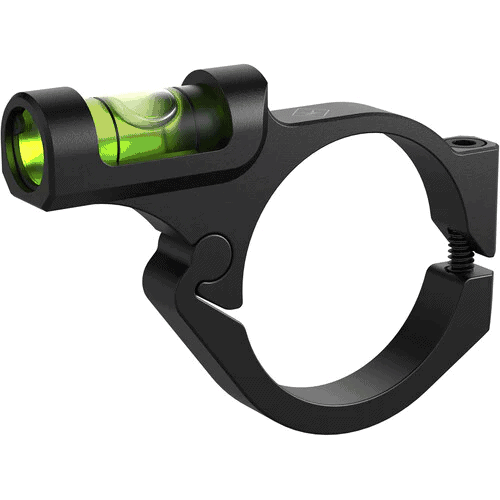
A bubble level often called a spirit level or simply a level, is a small, simple, yet highly effective tool designed to measure how inclined or tilted an object is in relation to the Earth’s gravity. What does this mean? Now, when you place your rifle on a gun vise in preparation for a shooting session, it is expected that you place it as straight as possible. However, this may not always be the case due to many reasons, including the shape of the ground surface where you place the gun vise. As a result, you might need a tool to help you maintain a straight path; this is where the bubble level comes in handy.
How a Bubble Level Works
A bubble level consists of a small, clear, and sealed tube that is partially filled with a liquid, often alcohol or oil, and a small air bubble trapped within the liquid. The tube is transparent and typically has a centerline and two reference lines, one on each side of the centerline.
The Air Bubble: The key component of a bubble level is the air bubble trapped inside the liquid. The bubble is free to move within the tube.
Alignment with Gravity: When the bubble level is placed on a surface or object, the force of gravity acts on the air bubble. Gravity naturally pulls the bubble toward the lowest point within the tube due to its buoyancy in the liquid.
Level Surface: If the surface or object on which the bubble level is placed is perfectly level (horizontal), the air bubble will move to the center of the tube, aligning itself with the centerline. This indicates that the surface is level.
Tilted Surface: If the surface or object is not level and is tilted in any direction, the air bubble will move away from the centerline toward the higher side of the tube. The distance the bubble moves from the centerline corresponds to the degree of tilt and the direction in which the surface is tilted.
Reading the Level: To determine the angle of tilt, a user simply reads the position of the air bubble relative to the reference lines on the tube. The reference lines provide a visual reference point for measuring the angle of deviation from level.
How Bubble Levels Are Mounted on Firearms
Mounting bubble levels on firearms is critical for precision shooters to ensure their rifles are held level during aiming and shooting. The placement of the bubble level can vary depending on personal preference, the type of firearm, and the shooting context. Here are some common ways bubble levels are mounted on firearms:
Scope-Mounted Levels
Bubble levels can be directly mounted on the rifle scope or on the scope rings. These levels are typically small, and they do not obstruct the shooter’s field of view through the scope. They are usually positioned so that the shooter can easily see and reference the level while looking through the scope. Some scope models also come with built-in bubble levels.
Picatinny or M-Lok Rail-Mounted Levels
Some shooters use specialized mounts or adapters to mount bubble levels on Picatinny or M-Lok rails. These rails allow greater flexibility in positioning the level to suit the shooter’s preferences and eye relief. Picatinny-mounted bubble levels are often adjustable for windage and elevation to ensure precise leveling.
When choosing the mounting method for a bubble level on a firearm, shooters should consider factors such as ease of use, visibility, and how well the level aligns with their shooting style. Additionally, proper installation and calibration of the bubble level are essential to ensure its accuracy.
Related article: What is the Best Scope Leveling Tool for your Rifle?
Benefits of using Bubble Levels
Using bubble levels in shooting offers a range of substantial benefits that directly contribute to improved marksmanship and overall shooting performance.
Improved Shot Consistency
Maintaining a level firearm is fundamental for consistent accuracy in shooting. The concept is simple: if your rifle is not level when you shoot, the bullet will follow a slightly different trajectory each time, resulting in inconsistent shot placement. A bubble level serves as a visual guide, allowing you to ensure that your firearm is perfectly level when aiming and firing. This consistency is particularly critical at longer distances, where even minor errors in rifle orientation can lead to significant deviations in the point of impact. Using a bubble level, you can achieve a high level of shot-to-shot consistency, leading to more predictable and repeatable shot placement.
Reduced Cant Errors
Canting, or tilting the rifle sideways, is a common error among shooters and can have a profound impact on bullet trajectory. When the rifle is canted, gravity acts at an angle, causing the bullet to veer off course. This can result in shots missing the intended target, especially at extended ranges. Bubble levels effectively address this issue by providing a clear visual reference for keeping the rifle perfectly level. Shooters can instantly detect any cant error and make the necessary corrections before taking the shot, thereby eliminating a major source of inaccuracy.
Enhanced Long-Range Shooting
Long-range shooting places high demands on accuracy and precision. Minute errors, such as uneven rifle positioning, become magnified over long distances. Bubble levels are invaluable tools for long-range shooters, as they allow for real-time adjustments to maintain a level rifle.
Consistency in Challenging Terrain
Shooting in uneven or hilly terrain presents a unique set of challenges. Maintaining a level shooting platform can be extremely difficult when the ground is sloped or when shooters need to adapt to various shooting positions and angles. Bubble levels provide shooters with a means to overcome these challenges by ensuring that the rifle remains level, regardless of the terrain. This adaptability and consistency are critical for shooters who encounter steep slopes, elevated positions, or uneven ground in their shooting environments.
Reduced Parallax Effects
High-powered scopes are susceptible to parallax errors, which can introduce aiming discrepancies. When the rifle is canted, the eye position relative to the scope’s reticle can change, leading to parallax-induced aiming errors. By keeping the rifle level with the assistance of a bubble level, shooters can reduce the likelihood of parallax effects affecting their accuracy.
Increased Confidence
Knowing that the rifle is level when aiming gives shooters a psychological advantage. Confidence is crucial in shooting, especially in high-pressure situations. When shooters are confident that their firearm is level, they can focus more on their target and shot execution, leading to more relaxed and accurate shooting. This increased confidence can positively impact overall marksmanship.
What Is Angle Cosine Indicator (ACI)?
An Angle Cosine Indicator (ACI) is a helpful tool for people who like to shoot targets from a distance. Imagine you’re aiming at something uphill or downhill. Because of the angle, the actual distance to your target would not be the same as what you see through your scope or sight. The ACI helps you figure out the horizontal distance to the target, which is the distance if the ground were flat. It does this by measuring the angle between you and the target. Once you know this angle, you can calculate the correct distance.
Why is this important? Well, when you’re shooting at long distances or angles, knowing the correct distance helps you adjust your aim so your shots hit where you want them to. It’s like having a special calculator that tells you exactly how to aim to make sure you don’t miss your target, even if it’s uphill or downhill. So, the ACI helps you be more accurate and successful in your shooting.
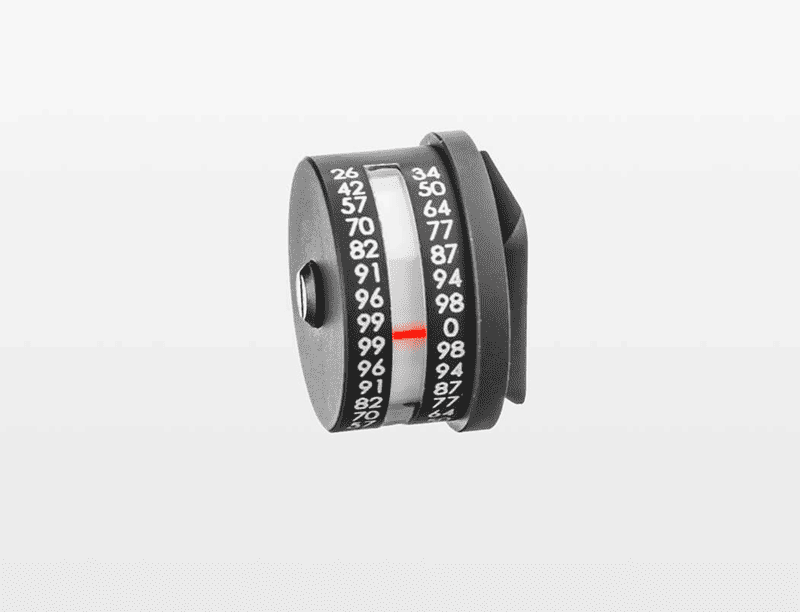
The ACI features a scale or dial that displays the cosine of the angle between the line of sight to the target and the horizontal plane. The cosine of an angle is a trigonometric function that calculates the ratio of the adjacent side of a right triangle to the hypotenuse. In the context of shooting, this ratio is essential for determining how much the bullet’s trajectory is affected by the angle.
Without compensating for the angle, shooting uphill or downhill can lead to shots hitting higher or lower than intended. The ACI helps to correct this.
How To Use Angle Cosine Indicator (ACI)
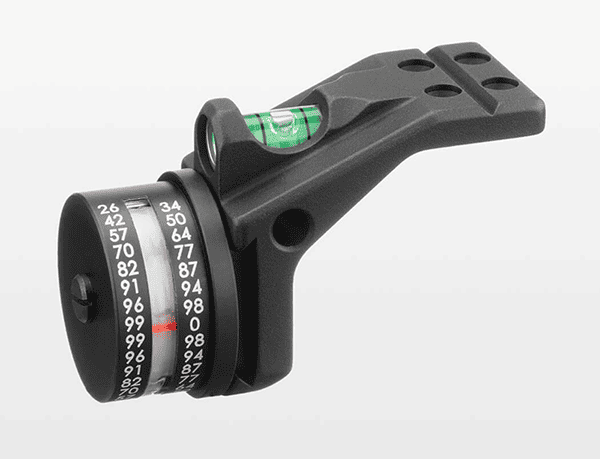
Mount the ACI
First, ensure that your Angle Cosine Indicator is securely mounted on your rifle. ACIs are typically attached to the rifle in a location that allows easy visibility while aiming. Common mounting options include attaching the ACI to the rifle’s scope, a scope mount, or a Picatinny/Weaver rail. The choice of location should be based on your personal preference and the type of rifle and scope you are using. Properly secure the ACI to prevent any movement or shifting during shooting, as this could affect the accuracy of angle measurements.
Align the ACI
Proper alignment is essential for accurate readings. The ACI should be aligned with the bore axis of the rifle, which means it should be parallel to the rifle’s barrel. You can use a bubble level to aid in this alignment process. Place the level on top of the ACI or adjacent to it and adjust the ACI’s positioning until the bubble in the level is centered. Aligning the ACI with the bore axis ensures that the angle measurement corresponds precisely to your line of sight and the direction the bullet will travel.
Note: It is always advisable to use your ACI in combination with your bubble level to ensure a leveled mounting.
Read the Angle
With the ACI securely mounted and properly aligned, look through your rifle’s scope or sights at the target. Observe the angle measurement displayed on the ACI’s scale or dial. This measurement indicates the angle between your line of sight to the target and the horizontal plane defined by gravity. The angle is typically displayed in degrees and may be marked in increments on the ACI’s scale for easy reference.
Calculate the Corrected Horizontal Distance
Once you have obtained the angle measurement from the ACI, you will use it to calculate the corrected horizontal distance to the target.
The formula for this calculation is:
Corrected Horizontal Distance = Line-of-Sight Distance × Cosine of the Angle
Line-of-Sight Distance: Also called true distance. This is the direct line-of-sight distance from your shooting position to the target. It’s the distance you would use without considering the angle.
Cosine of the Angle: This value is obtained by taking the cosine of the angle you measured with the ACI.
Case Study
Let’s say you are at the top of a hill and spot a game animal you want to shoot. When you look downhill through your scope, the distance from your scope to the animal is the actual distance (line-of-sight distance). This distance can be easily measured using a rangefinder.
Example 1
As an example, if your line-of-sight distance to the target is 500 yards, and the ACI measures an angle of 30 degrees:
Corrected Horizontal Distance = 500 yards × cos(30 degrees)
Corrected Horizontal Distance = 500 yards × 0.8660
Corrected Horizontal Distance ≈ 433 yards
Example 2
If your line-of-sight distance to the target is 80 yards, and the ACI measures an angle of 20 degrees:
Adjusted Distance = true distance x Cosine of Angle
Adjusted Distance = 80 yards x cos(20 degrees)
Adjusted Distance = 80 yards x 0.9397
Corrected Horizontal Distance ≈ 75.2 yards
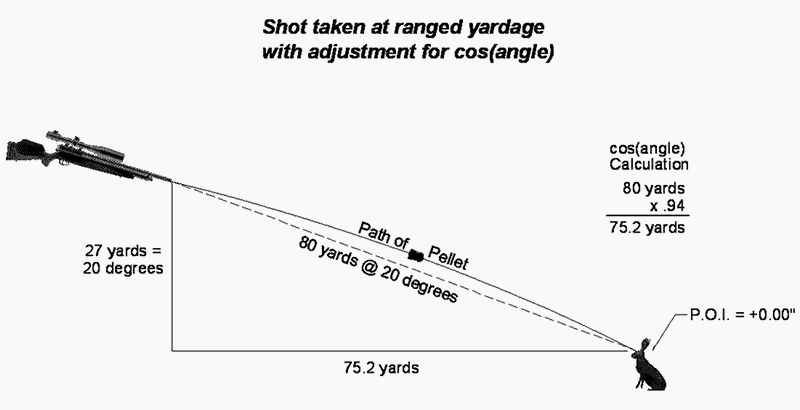
Image: https://azairgunner.files.wordpress.com/2011/01/angle_cosine.jpg
The corrected horizontal distance is what you will use to make the necessary adjustments to your scope or holdover to account for the angle, ensuring your shot is accurate, especially in long-range shooting scenarios.
Angle (Degrees) Cosine Value
0 1.0000
10 0.9848
20 0.9397
30 0.8660
40 0.7660
50 0.6428
60 0.5000
70 0.3420
80 0.1736
Adjust Your Scope or Holdover
Once you’ve calculated the corrected horizontal distance to the target using the formula provided earlier, it’s time to make the necessary adjustments to your rifle scope or your holdover. The correction compensates for the angle between you and the target, ensuring that your shot trajectory is adjusted accordingly to hit the target accurately. You have two primary options for making these adjustments:
Elevation Turret: If your scope has an elevation turret with adjustments in minutes of angle (MOA) or milliradians (mil), you can dial in the correction directly using the calculated corrected horizontal distance. Each click on the turret corresponds to a specific angular adjustment, typically specified in MOA or mils.
Holdover: If you prefer not to make turret adjustments or if your scope lacks target turrets, you can use a holdover method. Refer to your ballistic data or drop chart to determine how much to holdover for the given corrected distance. This usually involves using your reticle’s stadia lines or marks to aim higher or lower.
Take the Shot
After making the necessary adjustments to your scope or holdover based on the corrected distance, you’re ready to take the shot. Maintain your shooting position, focus on proper breathing, trigger control, and follow your standard marksmanship fundamentals to ensure a precise and controlled shot.
Confirm Impact
After taking the shot, carefully observe where the bullet impacts the target. Ideally, the shot should hit the target close to your point of aim, thanks to the correction made using the ACI and the corrected horizontal distance. If the impact is not where you intended, adjustments may still be necessary. Factors like wind, bullet ballistics, and other environmental conditions can affect the shot’s trajectory, so be prepared to make further corrections if needed.
Practice
Proficiency in using an ACI effectively comes with practice and experience. Familiarize yourself with your specific ACI and its scale so you can quickly and accurately read angle measurements. Practice measuring angles in various shooting scenarios, including uphill and downhill shots, to build confidence and consistency. Continuously refine your skills by regularly practicing with your ACI, making adjustments, and analyzing shot placement to ensure accuracy and precision in long-range shooting.
Benefits Of Angle Cosine Indicator
Accurate Angle Measurement
ACIs precisely measure the angle between the line of sight to the target and the horizontal plane. This measurement is crucial for making accurate adjustments when shooting at non-horizontal angles. Without an ACI, shooters might inaccurately estimate the angle and make incorrect adjustments, leading to missed shots or deviations from the intended point of impact.
Improved Shot Placement
ACIs compensate for angle-induced changes in bullet trajectory. When shooting at steep angles, gravity affects the bullet’s path differently, leading to either less or more bullet drop than expected. By accurately compensating for these effects, ACIs help shooters achieve precise shot placement, ensuring that the bullet hits the intended target location, even when shooting uphill or downhill.
Reduced Shot Dispersion
ACIs contribute to tighter shot groups by ensuring that shots consistently impact the intended point of impact. This reduction in shot dispersion improves overall accuracy and consistency in marksmanship. For competitive shooters, tighter shot groups are a key to success, and ACIs help eliminate one of the variables that can introduce dispersion.
Increased First-Round Hit Probability
ACIs significantly increase the likelihood of achieving first-round hits. In tactical scenarios, quick and accurate shots are essential, and follow-up shots can be time-consuming and risky. By accurately compensating for angles with the first shot, ACIs reduce the need for follow-up shots, improving efficiency and hit probability.
Efficiency and Time Savings
ACIs enable shooters to quickly and accurately adjust their scopes or sights based on angle measurements. This efficiency streamlines the shooting process, allowing shooters to make precise corrections without delay. The time saved by using ACIs eliminates the need for time-consuming trial-and-error corrections. Shooters can make informed adjustments in real time, making their shooting experiences more efficient and productive.
FAQs
What is the purpose of a bubble level on my scope?
The bubble level on your scope makes sure your rifle is level when you’re aiming. This helps you shoot straight and hit your target where you want to.
Where should I mount the bubble level on my rifle?
You can put the bubble level on your scope, the main part that helps you aim, or on the gun’s body. It’s usually best to put it where you can see it easily and it doesn’t get in the way.
What if my bubble level doesn’t show a perfect level when the rifle is on a stable surface?
If your bubble level doesn’t look level on a flat surface, it could be because the surface isn’t completely even. Try finding a more even surface to double-check, or you might need to make sure your bubble level is securely attached.
Why do I need an ACI for shooting at angles?
An ACI helps you shoot better when your target is uphill or downhill. It tells you the right distance to aim so you don’t miss your target because of the angle.
How do I use an ACI to calculate the corrected distance?
You use an ACI by measuring the angle to your target. Then, you use a simple formula to find the correct distance to aim for.
What if I don’t have an ACI on my scope?
If your scope doesn’t have an ACI, you can still shoot at angles, but it’s a bit trickier. You’ll need to estimate the angle and make adjustments based on your experience.
Can I use an ACI for all types of shooting?
Yes, you can use an ACI for hunting and competitive shooting. It helps you make more accurate shots no matter what kind of shooting you’re doing.
Do I need to account for angle corrections in every shot or only for steep angles?
It’s best to use an ACI for any shot at an angle, even if it’s not very steep. It helps make your shots more accurate, especially when precision matters.
Should I recalculate the angle for every shot?
If you’re shooting multiple times at similar angles, you can use the same angle measurement for consecutive shots as long as the shooting conditions remain consistent. However, it’s a good practice to double-check if conditions change.
Do ACIs work for both uphill and downhill shots?
Yes, ACIs are designed to work for both uphill and downhill shots.
Are there any maintenance tips for keeping an ACI accurate?
ACIs are generally low-maintenance. Ensure it’s securely mounted, and periodically check for any damage or misalignment.

Mike Hardesty is a published freelance gun writer. He also possesses specialized expertise in rifle scopes With dozens of articles and reviews published in Pew Pew Tactical, Snipercountry.com, and TTAG (The Truth About Guns), Mike is considered a firearms expert. His special area of expertise is handguns.
Mike is a long-time shooter. He has been punching paper targets, taking deer and other game and shooting at competitions since about 1975. Other related pursuits include reloading and bullet casting. He currently reloads for over 10 calibers, both handgun and rifle. His reloads, particularly for 9mm, were in great demand during the height of the ammo shortage among family and friends. He donated hundreds of rounds to informal shooting sessions. He was quoted as saying “I do not sell my reloads but I sure will help my guys shoot ’em for free!”. He has a few cherished firearms that he has inherited or otherwise procured — those are his favorites.
He earned B.S. and M.S. degrees from Indiana State University in 1974-1975.
He’s a firearm experts and is the founder of mhardesty.com.